Hello All! Donna today, my first post of the New Year, hope you are all having a great start to a great year!
During the holidays our very talented Tonya Gibbs posted a
Santa's List Holiday Organizer she made using a small 6 x 9 binder. I immediately thought of my husband using a book like this year round to organize his many notes, phone numbers and such which he gathers during every day life. Using the collection from Pink Paislee, Hope Chest, possibly tucked into one of the great
Warehouse Combo boxes available in the
Flamingo Scraps online store. Although Hope Chest has many florals, it also has a rustic feel to it, with some masculine graphics mixed into the rust, teal and weathered white ledger papers. Along with the paper, there were journal blocks in this collection and many paper tags and stickers. And very pretty butterfly clips, which I didn't think I needed to include in the hubs book!
I took quite a few photos to show the many elements included in this organizer! I'll start with the cover. Added to the Hope Chest paper pack, I had one clear mylar sheet with black graphics that I strategically cut to add, starting with the cover. It added a bit of continuity to the book, along with the one roll of green wood grain washi tape (my first jump into the washi tape world!), and helped transform the florals a little more. The cover sheet was cut to highlight the dog in the Hope Chest papers, as my husband adores our dog, I thought it was a great piece for the cover. In my stash I had some copper alpha/numeric pieces that blended well with the color scheme, used to add 2014. Centered on the cover was also a blank space which one of the stickers from the Hope Chest collection fit into perfectly, bracketed by copper pieces from the same set. The paper is tucked behind the vinyl cover and protected from daily use. The copper numbers and brackets are adhered with
matte medium on the outside of the protector
Close up of the sticker sentiment .
This is the inside cover, showing the vinyl pockets, covered by paper, adhered with double sided Scor Tape, available by special order through
Suzanne, just contact her by clicking on her name!
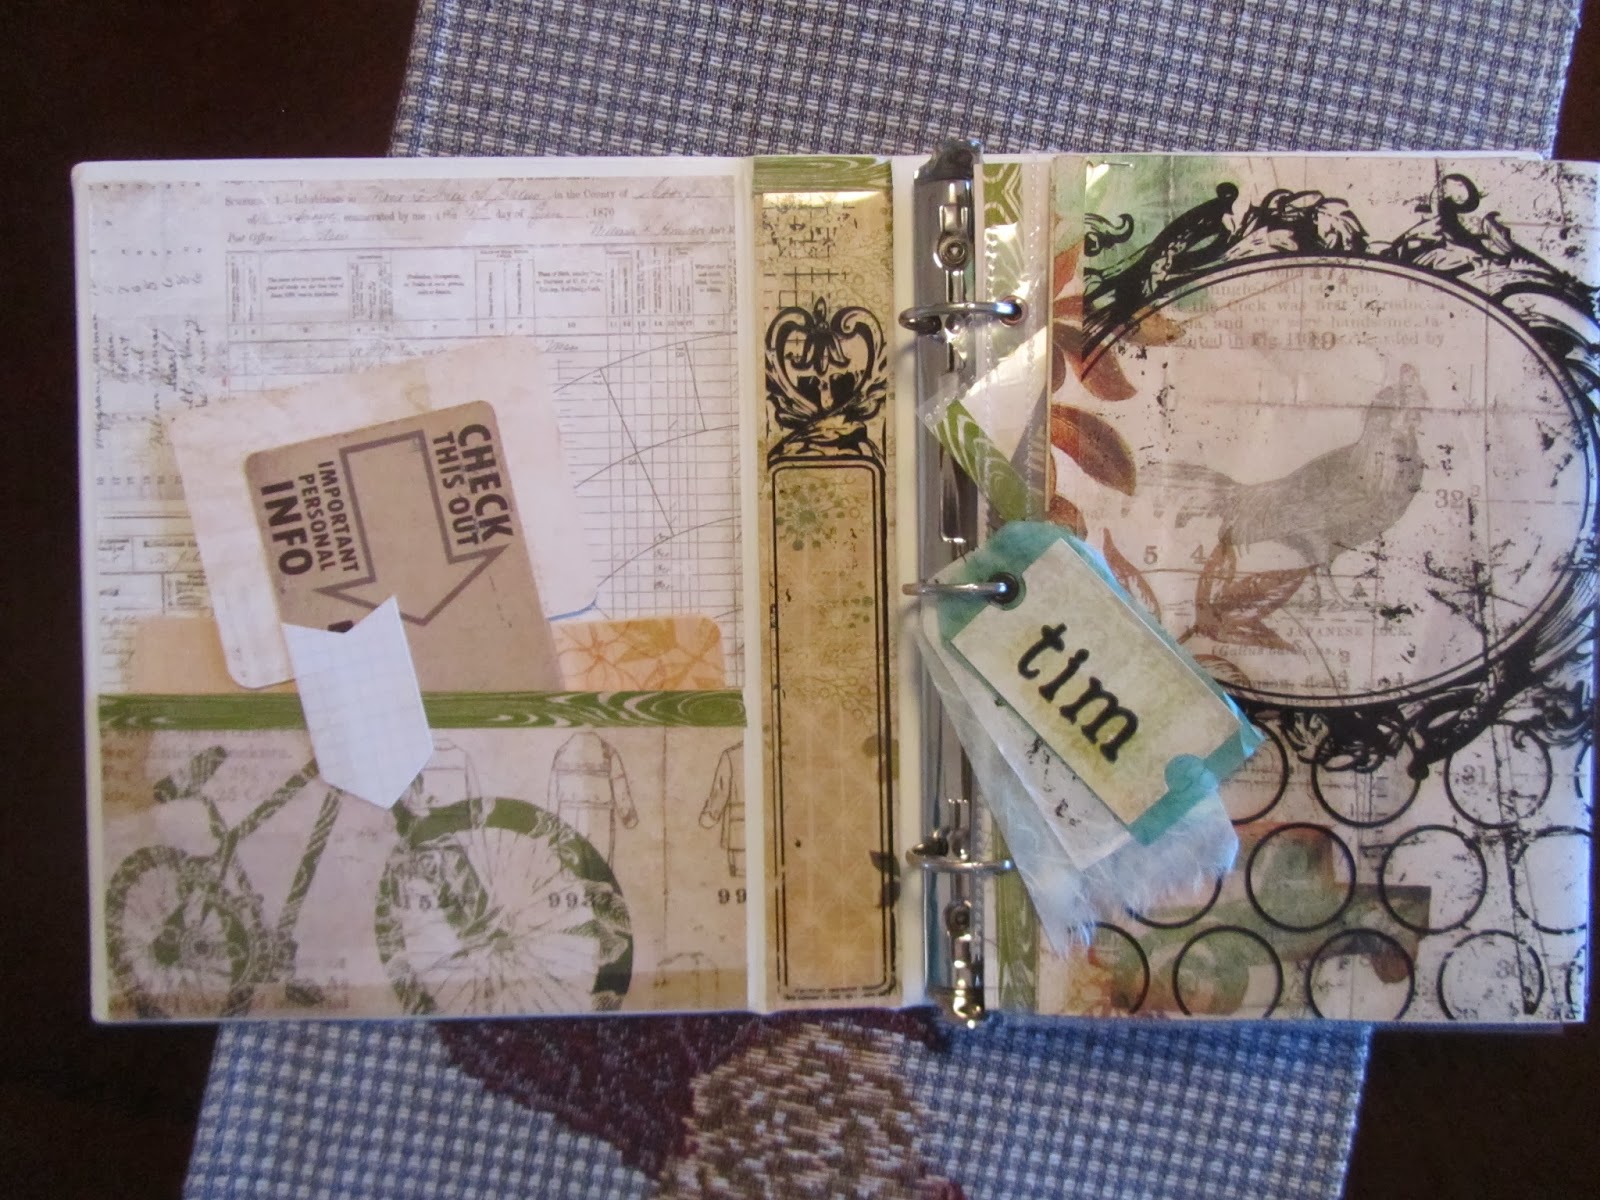
This pocket holds his contact info, along with some blank journaling cards to add throughout the book. The inside spine is covered with paper and a piece of the mylar graphic sheet over the top, left open at the sides to add to the blank text space. There are a few kraft journal cards from my stash, added as prompts to "get his book going".
A photo can also be place under the oval in the mylar sheet, or leave the rooster as is.
One additional mylar sheet added to a page protector, which I sliced off 1/8" to allow me to slide a piece of cardstock, then fold over to make an interactive page. Just to the right of the paper clip (from the collection, minus the butterfly) I used my Tim Holtz Tiny Attacher to hold the paper in place. He can slide a special photo into the page protector.
This is a view of the fold out page and the next pocket page, made easily by scoring a 12 x 12 paper down the center at 6", turn paper, score at 4", fold four inch fold up, then fold in half. Your pockets can be on the inside or the outside, depending on which way you decide to fold. Cutting page protectors to clip onto two rings to use as pockets (shown in another photo), I had a piece of protector let that I used to add as an additional element, adding journal blocks and prompts, this page highlighting Sunny, our dog, and a pocket to store his immunization and registration papers, and vet info.
On the reverse side is a pocket to store a to do list or receipts yet to be filed. I added a tag for interest. The Alphas used for Tim's name, Sunny and to do are from Tim Holtz Alpha elements, another item you could request from Suzanne for
special order. Using the dividers made for this notebook, I covered the front and back with patterned paper, it also gave them added strength.
This page shows the cut page protector on the left to use as a pocket or add a photo. A tag made with some newly found mulberry paper tags, found when I moved, and added a little scrap of the same mylar sheet.
The remaining photos are variations of the above pockets/pages. In the first photo you can see where I added the washi tape on each page, adding strength to the binder holes during use.
Into one of the full sized page protectors I added a 2014 weekly planner he can grab on the go for making future appointments and avoiding conflicting dates. I used the packaging page with the grid of all the papers included in the pack to coordinate with the organizer. For photography purposes, I left the lined notebook paper out, as we all know what that looks like! It allowed me to photograph back and fronts of the dividers without the lined paper interfering. I inserted tabs into the dividers by covering strops of paper with the washi tape, pulling that theme throughout the book further. I titled the tabs House, Doctor, Bank, Family (for addresses and phone numbers he may not have in his phone) and Photos.
Product list:
Flamingo Scraps
Warehouse combo box
Pink Paislee Hope Chest paper collection
Pink Paislee Journal Cards
Pink Paislee Label Stickers
Special orders from Suzanne
Tim Holtz Alpha Parts, Newsprint
Claudine Hellmuth matte medium adhesive
Scor tape (worked great for adhering paper to vinyl!)
Office Supply store
Avery 6" x 9" three ring binder with front/back view vinyl cover
Avery dividers & page protectors sized to match
Avery lined notebook paper to match (not photographed)
From my stash
Copper numbers and alphas (2014 and brackets)
Kraft Journal prompt cards
12 x 12 mylar sheet with black graphics
roll of green woodgrain washi tape
mulberry paper precut tags
Hope you enjoyed my version of Tonya's Organizer, be sure to check out more of her videos on her YouTube channel, she has some amazing tips and techniques, and is fun to watch. Flamingo Scraps is lucky to have her as our lead educator! Don't miss her
December Daily, which had a coordinated (sold out!) kit for sale at Flamingo Scraps, and follow her week by week journey throughout November/December! She has endless energy and loves to share with all of us, special Ustream events 1st Monday of each month, link is always posted on her
FB page.
Don't forget to check out the sales going on at the
Flamingo Scraps store, and if you don't see what you need,
Suzanne with do her best to get what you're looking for!
Scrappy Smiles!!! Donna Sullivan